Attention: Here be dragons
This is the latest
(unstable) version of this documentation, which may document features
not available in or compatible with released stable versions of Godot.
Checking the stable version of the documentation...
使用 GridMap
前言
Gridmaps 是一种用于创建3D游戏关卡的工具, 方式类似于2D中使用 TileMap . 使用一个定义好的可以放在一个网格中的 3D mesh (a MeshLibrary) (译注,grid和mesh都译作网格, 这里为了清晰,mesh直接使用英文,grid则译作网格)对象集合搭建关卡, 就像您使用无限多数量的乐高积木搭建世界一样.
就像使用tilemap的tile一样, 碰撞和导航也可以添加到网格中.
示例项目
To learn how GridMaps work, start by downloading the sample project: gridmap_starter.zip.
解压缩此项目并使用“导入”按钮将其添加到项目管理器。
创建 MeshLibrary
To begin, you need a MeshLibrary, which is a collection of individual meshes that can be used in the gridmap. Open the "mesh_library_source.tscn" scene to see an example of how to set up the mesh library.
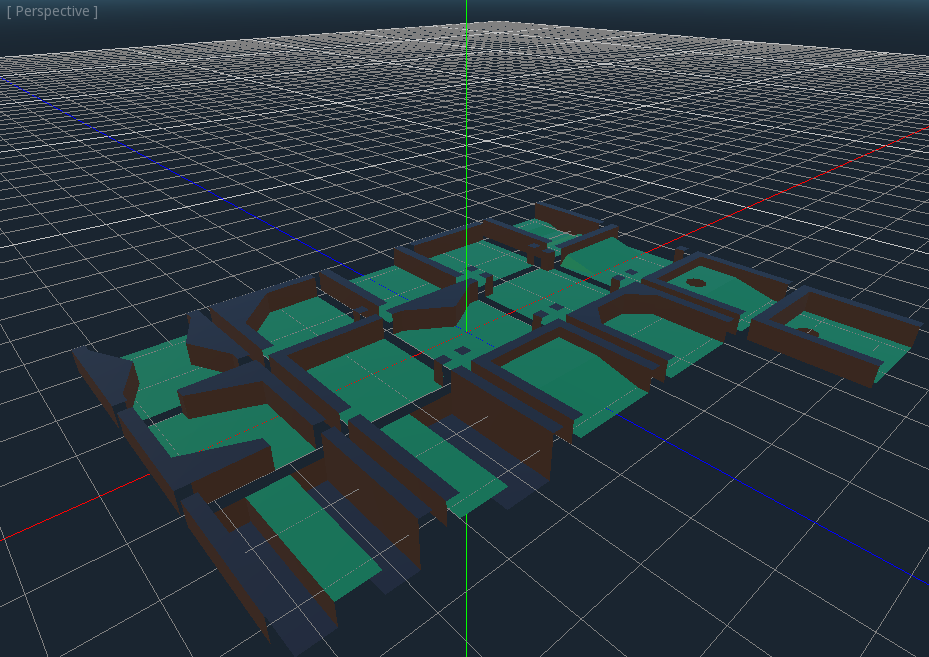
As you can see, this scene has a Node3D node as its root, and a number of MeshInstance3D node children.
如果您的场景中不需要任何物理, 那么到这里就完成了. 但是, 在大多数情况下, 您还需要给网格指定碰撞体.
碰撞
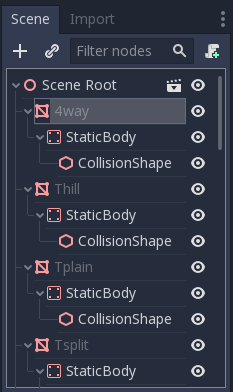
You can manually assign a StaticBody3D and CollisionShape3D to each mesh. Alternatively, you can use the "Mesh" menu to automatically create the collision body based on the mesh data.
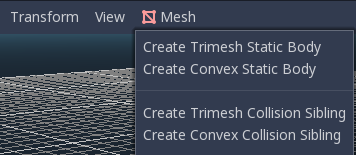
请注意,“凸”(Convex)碰撞体对于简单 Mesh 效果更好。对于更复杂的形状,请选择“创建三角网格静态体”。一旦每个网格都分配了物理主体和碰撞形状,就可以使用网格库了。
材质
在生成网格库时, 只使用网格内的材质. 节点上设置的材质将被忽略.
NavigationMesh
和所有网格实例一样,MeshLibrary 的项目可以用 NavigationMesh 赋值,既可以手动创建,也即可按下面的说明进行烘焙。
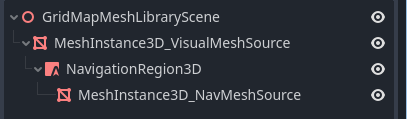
To create the NavigationMesh from a MeshLibrary scene export, place a NavigationRegion3D child node below the main MeshInstance3D for the GridMap item. Add a valid NavigationMesh resource to the NavigationRegion3D and some source geometry nodes below and bake the NavigationMesh.
备注
如果单元格比较小,一般需要把 NavigationMesh 属性里的代理半径和最小地区大小降低。
Nodes below the NavigationRegion3D are ignored for the MeshLibrary scene export, so additional nodes can be added as source geometry just for baking the navmesh.
警告
烘焙 NavigationMesh 的单元格大小必须与 NavigationServer 地图的单元格大小一致,才能把不同 Grid 单元格的导航网格合并起来。
导出 MeshLibrary
To export the library, click on Scene > Export As... > MeshLibrary..., and save it as a resource.
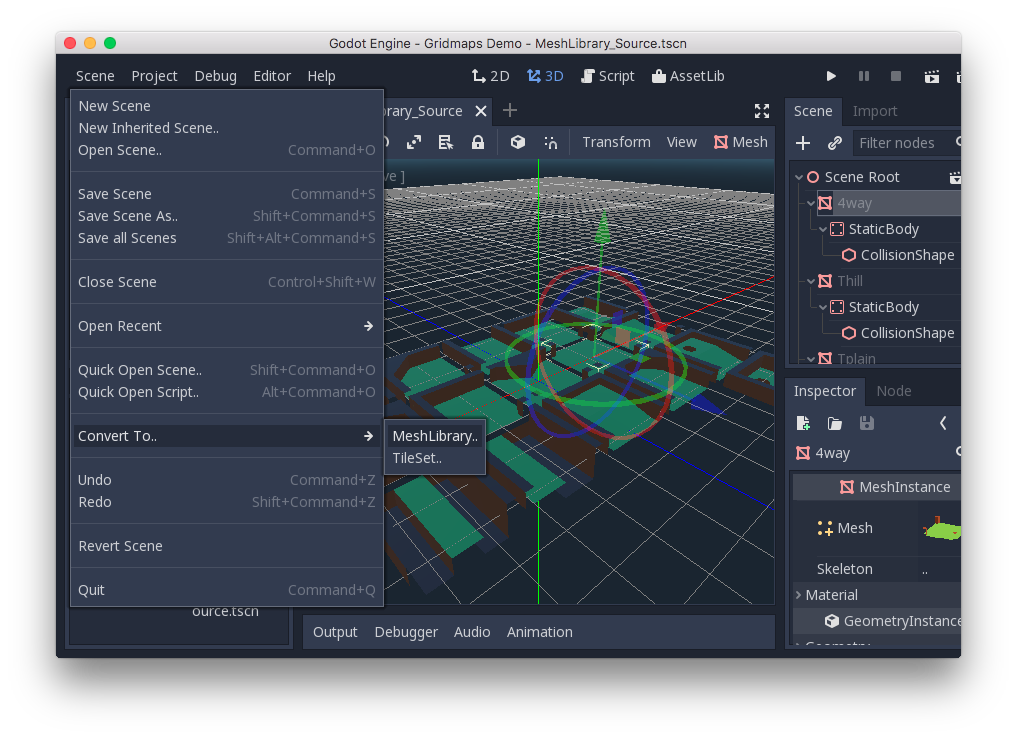
可以在项目中找到已导出的名为“MeshLibrary.tres”的 MeshLibrary。
使用 GridMap
创建一个新场景并添加一个 GridMap 节点。通过从文件系统面板拖动资源文件并将其放入检查器中的“Theme”(主题)属性中来添加网格库。
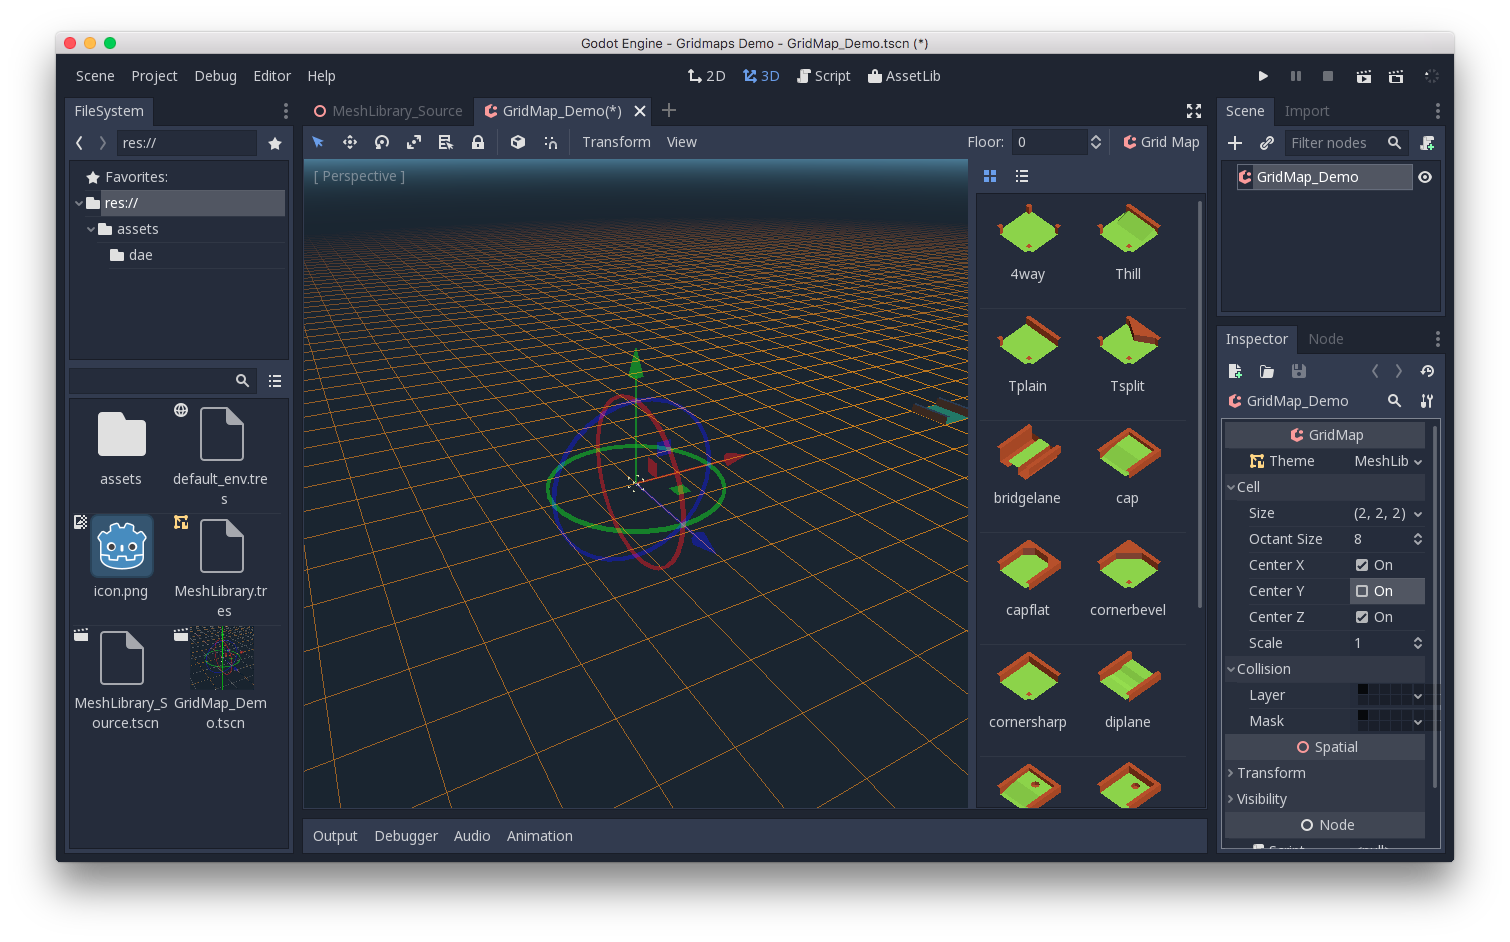
“Cell/Size”属性应设置为网格的大小。在本示例中您可以使用默认值。将“Center Y”属性设置为“未启用”。
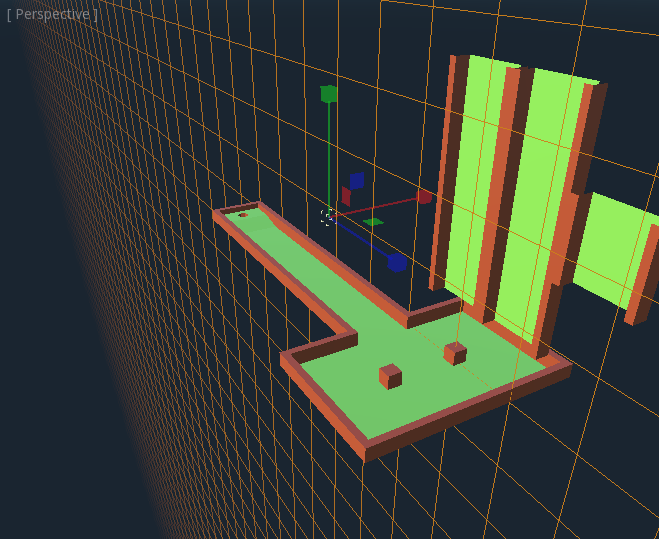
Now you can start designing the level by choosing a tile from the palette and placing it with Left-Click in the editor window. Use Right-click to remove a tile.
Use the arrows next to the "GridMap" menu to change the floor that you are working on.
单击“GridMap”菜单可以查看选项和快捷键。例如,按下 S 绕 Y 轴旋转图块。

按住 Shift 并使用鼠标左键拖动将绘制一个选择框. 您可以使用相应的菜单选项复制或清除所选区域.
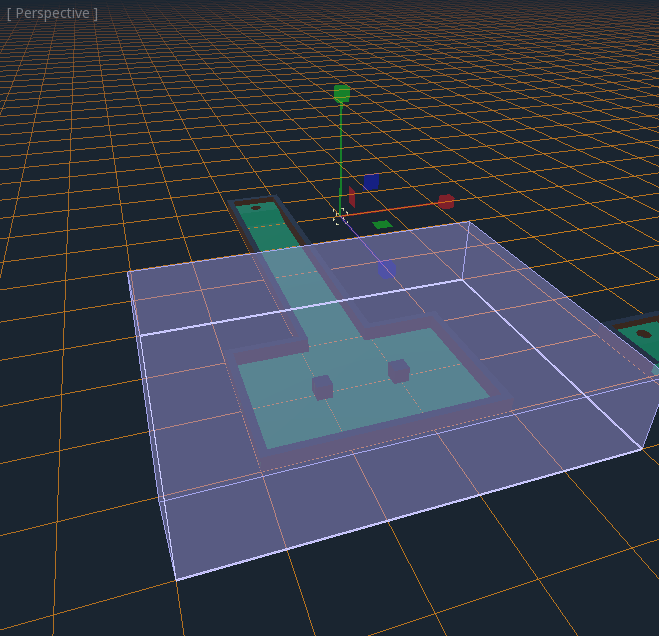
在菜单中, 您还可以更改正在绘制的轴, 并将绘图平面在其轴上移动得更高或更低.
在代码中使用 GridMap
有关节点方法和成员变量的详细信息, 请参阅 GridMap.