Attention: Here be dragons
This is the latest
(unstable) version of this documentation, which may document features
not available in or compatible with released stable versions of Godot.
Checking the stable version of the documentation...
2D 网格
前言
在 3D 中,网格用于显示世界。在 2D 中它们不常见,因为图片使用得更频繁。Godot 的 2D 部分是一个纯 2D 引擎,因此它不能直接显示 3D 网格(尽管它可以通过 Viewport 和 ViewportTexture 来实现)。
参见
如果你对在二维视口上显示三维网格感兴趣, 请参见 使用 Viewport 作为纹理 教程.
2D 网格是包含二维几何(Z 轴可以省略或忽略)而不是三维几何的网格。你可以尝试使用代码中的 SurfaceTool 创建它们,并在 MeshInstance2D 节点中显示它们。
Currently, the only way to generate a 2D mesh within the editor is by either importing an OBJ file as a mesh, or converting it from a Sprite2D.
优化绘制的像素
在某些情况下, 这个工作流程对于优化二维绘图比较有用. 当绘制具有透明度的大型图像时,Godot将把整个四方形(quad)绘制到屏幕上. 大片的透明区域还是会被绘制.
如果绘制非常大的图像时(大概屏幕大小),或者将多个有大透明区域的图像叠加在一起(例如使用 ParallaxBackground 时),这会影响性能,尤其是在移动设备上。
转换成网格能确保只绘制不透明部分, 其余部分被忽略.
Converting Sprite2Ds to 2D meshes
You can take advantage of this optimization by converting a Sprite2D to a MeshInstance2D.
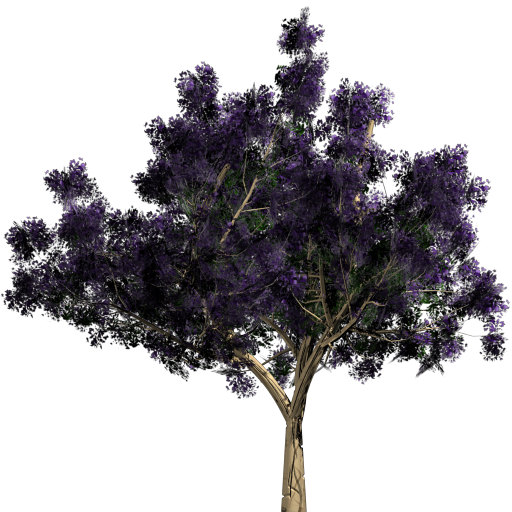
Start with an image that contains large amounts of transparency on the edges, like this tree:
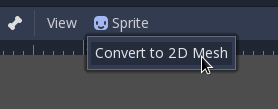
Put it in a Sprite2D and select "Convert to 2D Mesh" from the menu:
会出现一个对话框, 显示将要创建的二维网格预览:
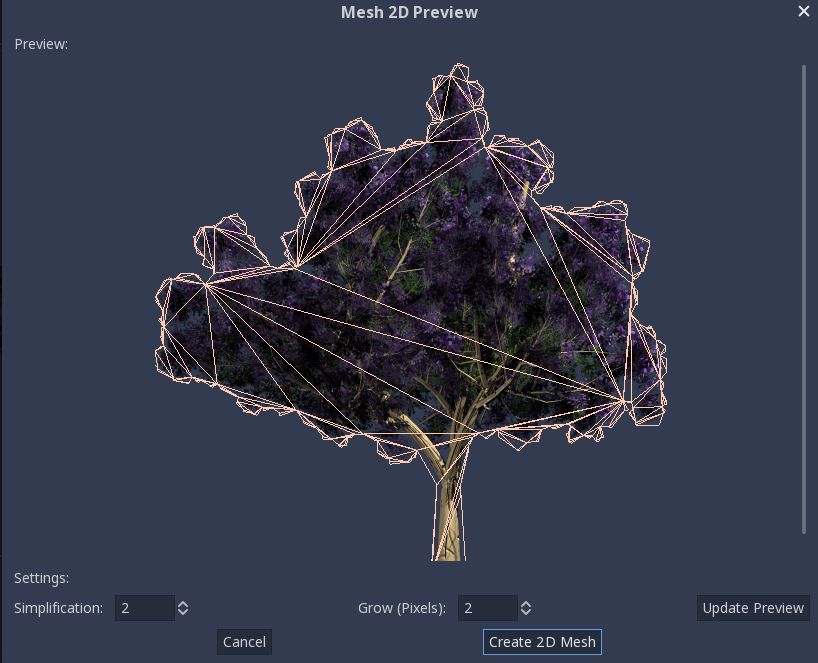
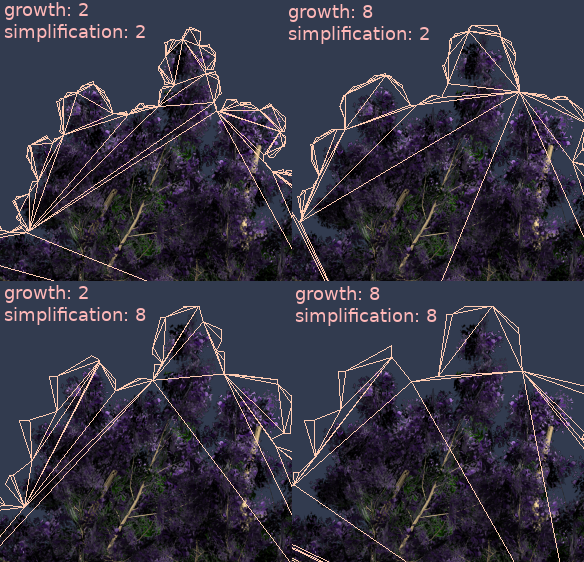
很多情况下, 默认值已经足够好, 但是你可以根据需要改变growth(增长)和simplication(简化):
Finally, push the Convert 2D Mesh button and your Sprite2D will be replaced:
