Attention: Here be dragons
This is the latest
(unstable) version of this documentation, which may document features
not available in or compatible with released stable versions of Godot.
Checking the stable version of the documentation...
分数与重玩
在这一部分中,我们会添加计分、播放音乐、重启游戏的能力。
我们要用一个变量来记录当前的分数,使用最简的界面在屏幕上显示。我们会用文本标签来实现。
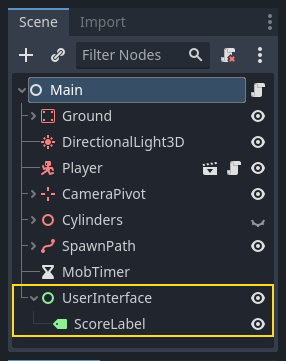
In the main scene, add a new child node Control to Main and name it
UserInterface. You will automatically be taken to the 2D screen, where you can
edit your User Interface (UI).
Add a Label node and name it ScoreLabel
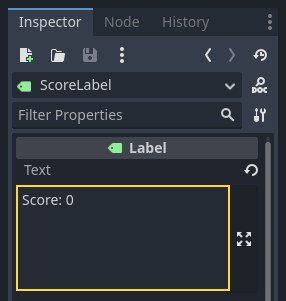
在检查器中将该 Label 的 Text 设为类似“Score: 0”的占位内容。
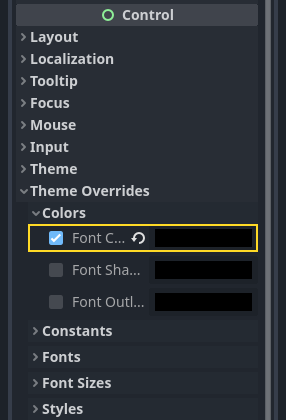
并且,文本默认是白色的,和我们的游戏背景一样。我们需要修改它的颜色,才能在运行时看到。
Scroll down to Theme Overrides, and expand Colors and enable Font Color in order to tint the text to black (which contrasts well with the white 3D scene)
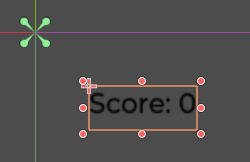
最后单击视口中的文本,将其拖离左上角。
The UserInterface node allows us to group our UI in a branch of the scene tree
and use a theme resource that will propagate to all its children. We'll use it
to set our game's font.
创建 UI 主题
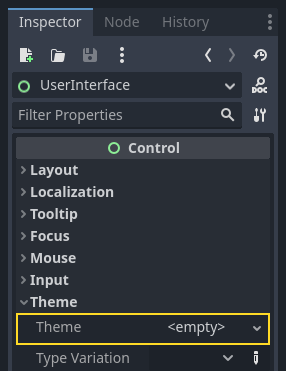
Once again, select the UserInterface node. In the Inspector, create a new
theme resource in Theme -> Theme.
单击这个资源就会在底部面板中打开主题编辑器。会展示使用你的主题资源时内置 UI 控件的外观。
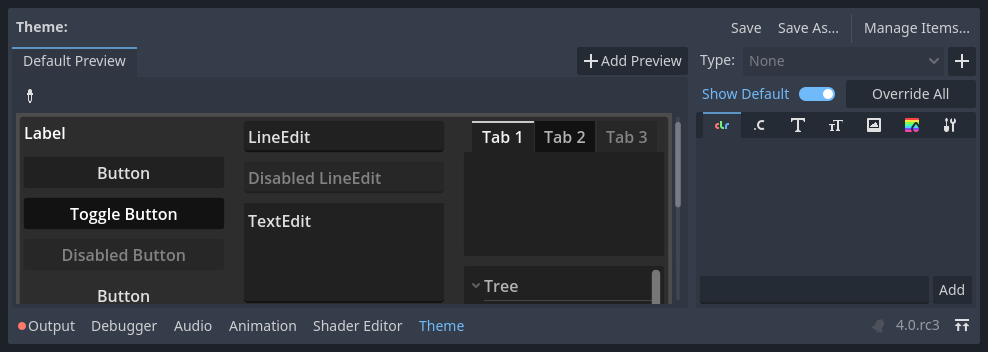
默认情况下,主题只有一个属性,Default Font(默认字体)。
参见
你可以为主题资源添加更多属性,从而设计更复杂的用户界面,不过这就超出本系列的范畴了。要学习主题的创建和编辑,请参阅 GUI 皮肤简介。
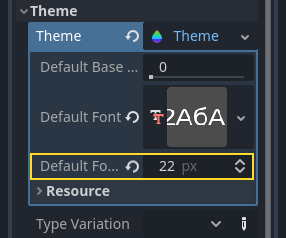
This one expects a font file like the ones you have on your computer. Two common font file formats are TrueType Font (TTF) and OpenType Font (OTF).
In the FileSystem dock, expand the fonts directory and click and drag the
Montserrat-Medium.ttf file we included in the project onto the Default Font.
The text will reappear in the theme preview.
The text is a bit small. Set the Default Font Size to 22 pixels to increase the text's size.
跟踪得分
Let's work on the score next. Attach a new script to the ScoreLabel and define
the score variable.
extends Label

var score = 0
using Godot;

public partial class ScoreLabel : Label
{
    private int _score = 0;
}
The score should increase by 1 every time we squash a monster. We can use
their squashed signal to know when that happens. However, because we instantiate
monsters from the code, we cannot connect the mob signal to the ScoreLabel via the editor.
不过,我们可以在每次生成一只怪物时通过代码来进行连接。
Open the script main.gd. If it's still open, you can click on its name in
the script editor's left column.
Alternatively, you can double-click the main.gd file in the FileSystem
dock.
At the bottom of the _on_mob_timer_timeout() function, add the following
line:
func _on_mob_timer_timeout():
    #...
    # We connect the mob to the score label to update the score upon squashing one.
    mob.squashed.connect($UserInterface/ScoreLabel._on_mob_squashed.bind())
private void OnMobTimerTimeout()
{
    // ...
    // We connect the mob to the score label to update the score upon squashing one.
    mob.Squashed += GetNode<ScoreLabel>("UserInterface/ScoreLabel").OnMobSquashed;
}
This line means that when the mob emits the squashed signal, the
ScoreLabel node will receive it and call the function _on_mob_squashed().
Head back to the ScoreLabel.gd script to define the _on_mob_squashed()
callback function.
这里我们将进行加分并更新显示的文本。
func _on_mob_squashed():
    score += 1
    text = "Score: %s" % score
public void OnMobSquashed()
{
    _score += 1;
    Text = $"Score: {_score}";
}
The second line uses the value of the score variable to replace the
placeholder %s. When using this feature, Godot automatically converts values
to string text, which is convenient when outputting text in labels or
when using the print() function.
参见
You can learn more about string formatting here: GDScript 格式字符串. In C#, consider using string interpolation with "$".
你现在可以玩游戏,压死几个敌人,看看分数的增长。

备注
在一个复杂的游戏中,你可能想把你的用户界面与游戏世界完全分开。在这种情况下,你就不会在标签上记录分数了。相反,你可能想把它存储在一个单独的、专门的对象中。但当原型设计或你的项目很简单时,保持你的代码简单就可以了。编程总是一种平衡的行为。
重玩游戏
我们现在就要添加死亡后重玩的能力。玩家死亡后,我们会在屏幕上现实一条消息并等待输入。
Head back to the main.tscn scene, select the UserInterface node, add a
child node ColorRect, and name it Retry. This node fills a
rectangle with a uniform color and will serve as an overlay to darken the
screen.
To make it span over the whole viewport, you can use the Anchor Preset menu in the toolbar.

点击打开,并应用整个矩形命令。
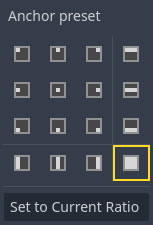
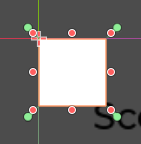
Nothing happens. Well, almost nothing; only the four green pins move to the corners of the selection box.
This is because UI nodes (all the ones with a green icon) work with anchors and
margins relative to their parent's bounding box. Here, the UserInterface node
has a small size and the Retry one is limited by it.
Select the UserInterface and apply Anchor Preset -> Full Rect to it as well. The
Retry node should now span the whole viewport.
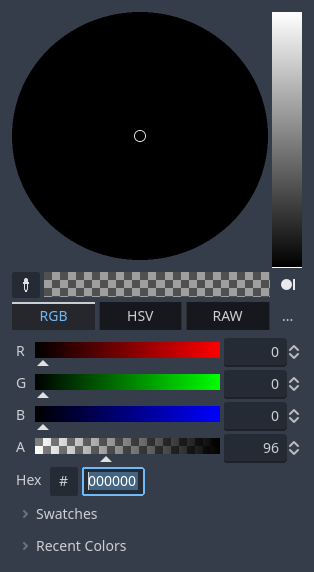
Let's change its color so it darkens the game area. Select Retry and in the
Inspector, set its Color to something both dark and transparent. To do so,
in the color picker, drag the A slider to the left. It controls the color's
Alpha channel, that is to say, its opacity/transparency.
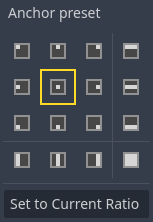
Next, add a Label as a child of Retry and give it the Text
"Press Enter to retry."
To move it and anchor it in the center of the screen, apply Anchor Preset -> Center
to it.
编写重试选项
We can now head to the code to show and hide the Retry node when the player
dies and plays again.
Open the script main.gd. First, we want to hide the overlay at the start of
the game. Add this line to the _ready() function.
func _ready():
    $UserInterface/Retry.hide()
public override void _Ready()
{
    GetNode<Control>("UserInterface/Retry").Hide();
}
然后在玩家受到攻击时,我们就显示这个覆盖层。
func _on_player_hit():
    #...
    $UserInterface/Retry.show()
private void OnPlayerHit()
{
    //...
    GetNode<Control>("UserInterface/Retry").Show();
}
Finally, when the Retry node is visible, we need to listen to the player's
input and restart the game if they press enter. To do this, we use the built-in
_unhandled_input() callback, which is triggered on any input.
If the player pressed the predefined ui_accept input action and Retry is
visible, we reload the current scene.
func _unhandled_input(event):
    if event.is_action_pressed("ui_accept") and $UserInterface/Retry.visible:
        # This restarts the current scene.
        get_tree().reload_current_scene()
public override void _UnhandledInput(InputEvent @event)
{
    if (@event.IsActionPressed("ui_accept") && GetNode<Control>("UserInterface/Retry").Visible)
    {
        // This restarts the current scene.
        GetTree().ReloadCurrentScene();
    }
}
我们可以通过 get_tree() 函数访问全局 SceneTree 对象,然后用它来重新加载并重启当前场景。
添加音乐
要添加音乐,让音乐在后台连续播放,我们就要用到 Godot 的另一项特性:自动加载。
To play audio, all you need to do is add an AudioStreamPlayer node to your scene and attach an audio file to it. When you start the scene, it can play automatically. However, when you reload the scene, like we do to play again, the audio nodes are also reset, and the music starts back from the beginning.
你可以使用自动加载功能来让 Godot 在游戏开始时自动加载节点或场景,不依赖于当前场景。你还可以用它来创建能够全局访问的对象。
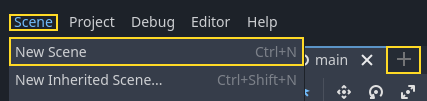
Create a new scene by going to the Scene menu and clicking New Scene or by using the + icon next to your currently opened scene.
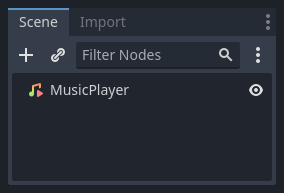
Click the Other Node button to create an AudioStreamPlayer and rename it to
MusicPlayer.
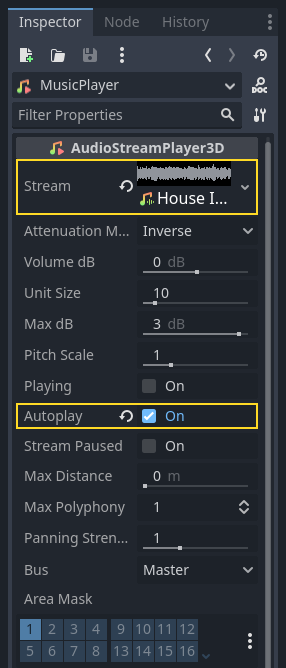
我们在 art/ 目录中包含了一条音乐音轨 House In a Forest Loop.ogg。单击并把它拖放到检查器中的 Stream(流)属性上。同时要打开 Autoplay,这样音乐就会在游戏开始时自动播放了。
将这个场景保存为 MusicPlayer.tscn。
我们需要将其注册为自动加载。前往菜单项目 -> 项目设置...,然后单击自动加载选项卡。
路径输入框中需要输入场景的路径。单击文件夹图标打开文件浏览器,然后双击 MusicPlayer.tscn。接下来,单击右侧的添加按钮,将该节点进行注册。

MusicPlayer.tscn now loads into any scene you open or play.
So if you run the game now, the music will play automatically in any scene.
在这一节课结束之前,我们来看一下在底层发生了什么。运行游戏时,你的场景面板会多出来两个选项卡:远程和本地。
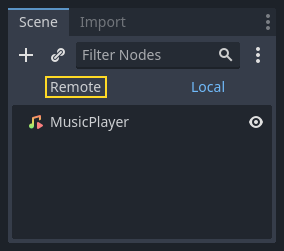
你可以在远程选项卡中查看运行中的游戏的节点树。你会看到 Main 节点以及场景中所包含的所有东西,最底部是实例化的小怪。
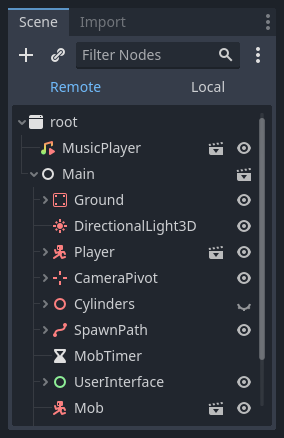
At the top are the autoloaded MusicPlayer and a root node, which is your
game's viewport.
这一节课就是这样。在下一部分,我们会添加动画,让游戏更美观。
Here is the complete main.gd script for reference.
extends Node

@export var mob_scene: PackedScene

func _ready():
    $UserInterface/Retry.hide()


func _on_mob_timer_timeout():
    # Create a new instance of the Mob scene.
    var mob = mob_scene.instantiate()

    # Choose a random location on the SpawnPath.
    # We store the reference to the SpawnLocation node.
    var mob_spawn_location = get_node("SpawnPath/SpawnLocation")
    # And give it a random offset.
    mob_spawn_location.progress_ratio = randf()

    var player_position = $Player.position
    mob.initialize(mob_spawn_location.position, player_position)

    # Spawn the mob by adding it to the Main scene.
    add_child(mob)

    # We connect the mob to the score label to update the score upon squashing one.
    mob.squashed.connect($UserInterface/ScoreLabel._on_mob_squashed.bind())

func _on_player_hit():
    $MobTimer.stop()
    $UserInterface/Retry.show()

func _unhandled_input(event):
    if event.is_action_pressed("ui_accept") and $UserInterface/Retry.visible:
        # This restarts the current scene.
        get_tree().reload_current_scene()
using Godot;

public partial class Main : Node
{
    [Export]
    public PackedScene MobScene { get; set; }

    public override void _Ready()
    {
        GetNode<Control>("UserInterface/Retry").Hide();
    }

    public override void _UnhandledInput(InputEvent @event)
    {
        if (@event.IsActionPressed("ui_accept") && GetNode<Control>("UserInterface/Retry").Visible)
        {
            // This restarts the current scene.
            GetTree().ReloadCurrentScene();
        }
    }

    private void OnMobTimerTimeout()
    {
        // Create a new instance of the Mob scene.
        Mob mob = MobScene.Instantiate<Mob>();

        // Choose a random location on the SpawnPath.
        // We store the reference to the SpawnLocation node.
        var mobSpawnLocation = GetNode<PathFollow3D>("SpawnPath/SpawnLocation");
        // And give it a random offset.
        mobSpawnLocation.ProgressRatio = GD.Randf();

        Vector3 playerPosition = GetNode<Player>("Player").position;
        mob.Initialize(mobSpawnLocation.Position, playerPosition);

        // Spawn the mob by adding it to the Main scene.
        AddChild(mob);

        // We connect the mob to the score label to update the score upon squashing one.
        mob.Squashed += GetNode<ScoreLabel>("UserInterface/ScoreLabel").OnMobSquashed;
    }

    private void OnPlayerHit()
    {
        GetNode<Timer>("MobTimer").Stop();
        GetNode<Control>("UserInterface/Retry").Show();
    }
}